
Support / Wordpress Installation / How do I set up email sending in WordPress?
Who is this for?
Anyone running WordPress on Hostpepper hosting whose site needs to send email: contact forms, password resets, order confirmations, or membership notifications.
Why you need this
By default, WordPress tries to send email through PHP's built-in mail() function. For security and deliverability, our web servers don't send mail directly; that job is handled by our dedicated mail servers. So a brand-new WordPress site can't send anything until you connect it to a mailbox, and until you do, you'll often see errors like ‘There was an error trying to send your message’ on your contact forms.
The good news: it only takes about 10 minutes. You create a mailbox in your control panel, then point WordPress at it with a free SMTP plugin. It's a one-time setup, and it also improves deliverability, because email sent from a real mailbox on your own domain is far less likely to land in spam.
Step 1: Create a mailbox in the control panel
1. Log in to your Hostpepper control panel and open your hosting product.
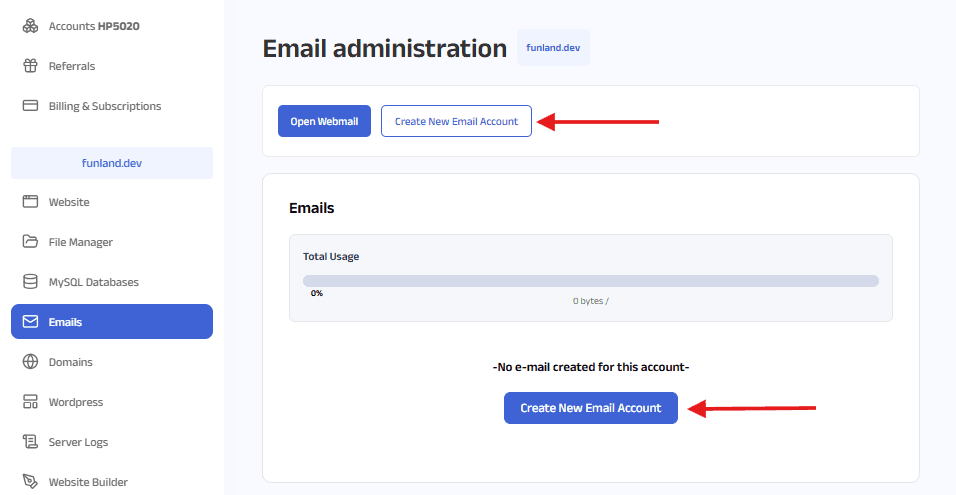
2. Go to Email in the left menu.
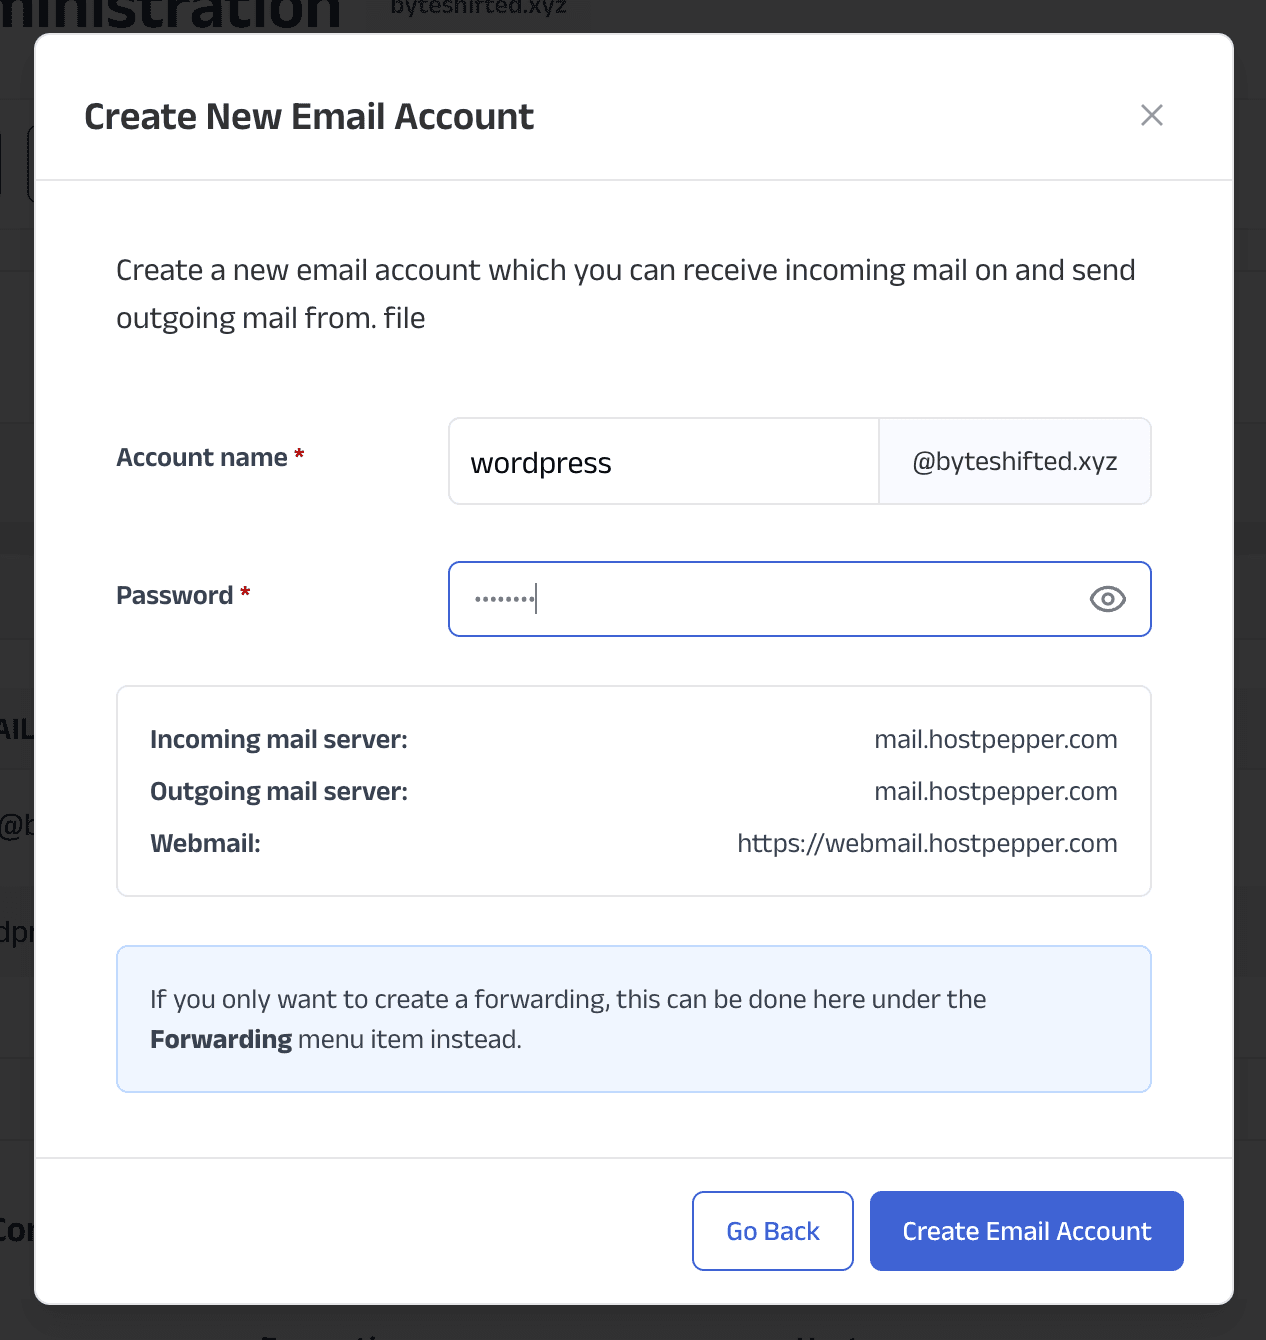
3. Create a new mailbox, for example noreply@yourdomain.com or contact@yourdomain.com.
4. Set a strong password, and save it somewhere safe. You'll need it in Step 3.
Step 2: Install the WP Mail SMTP plugin
1. Log in to your WordPress admin area (yourdomain.com/wp-admin).
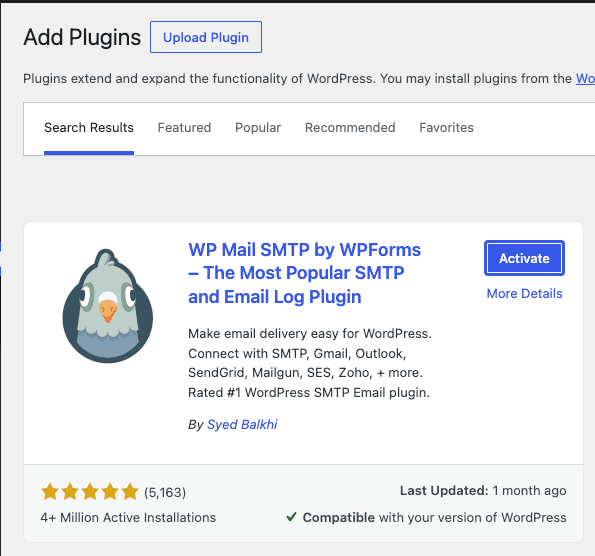
2. Go to Plugins → Add New.
3. Search for WP Mail SMTP, then click Install Now and Activate.
Step 3: Connect WordPress to your mailbox
In WordPress, go to WP Mail SMTP → Settings and fill in the following:
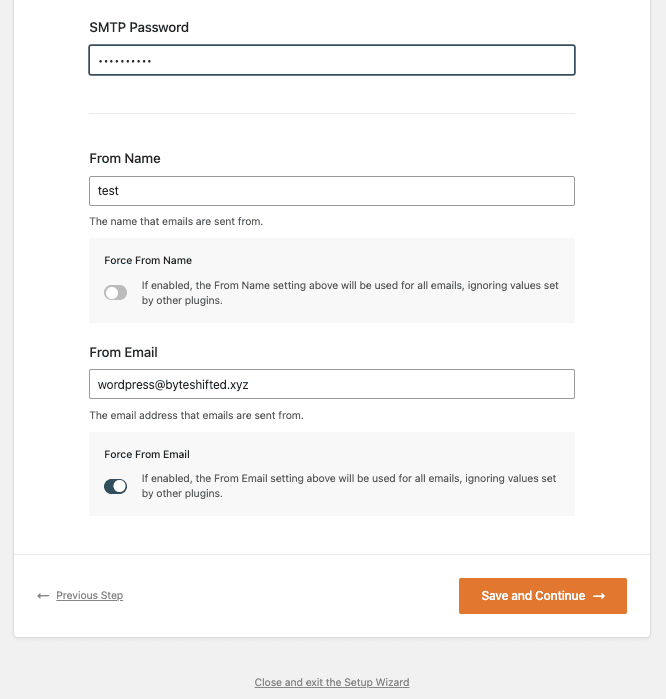
From Email: the mailbox address you created in Step 1.
From Name: your website or business name.
Mailer: choose Other SMTP.
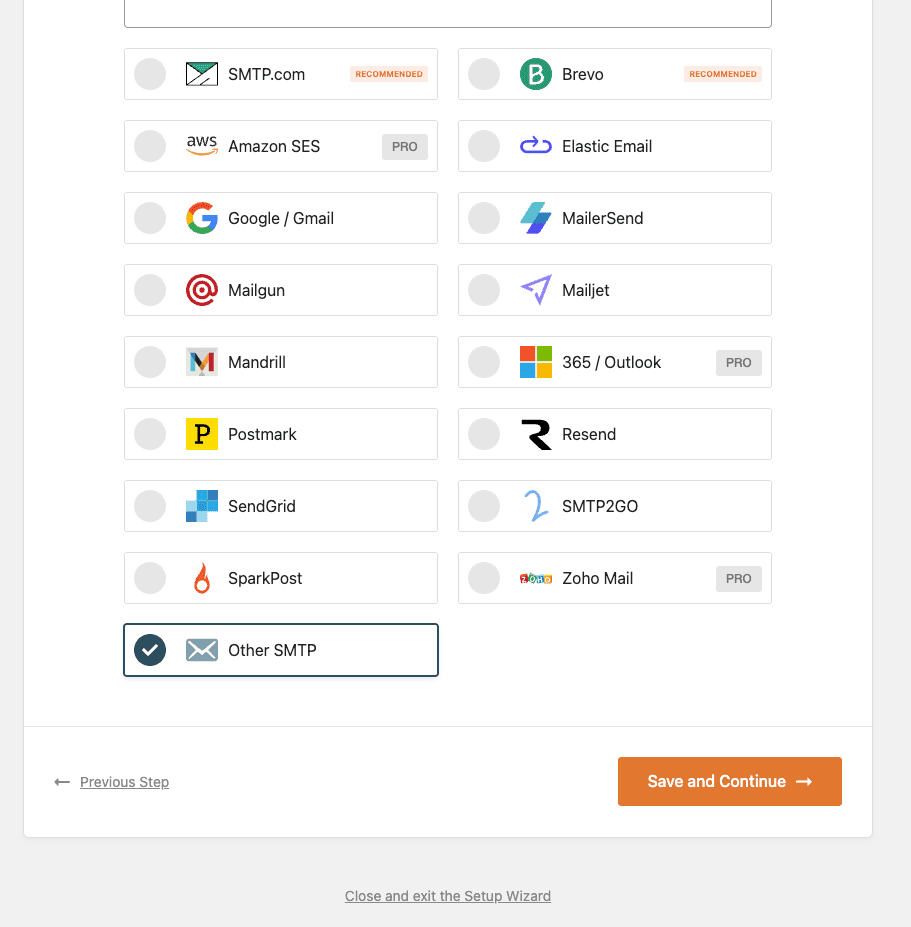
Then, under Other SMTP, enter these values:
SMTP Host:mail.hostpepper.com
Encryption: TLS (recommended) or SSL.
SMTP Port: 587 for TLS, or 465 for SSL.
Authentication: On.
SMTP Username: your full mailbox address, for example contact@yourdomain.com.
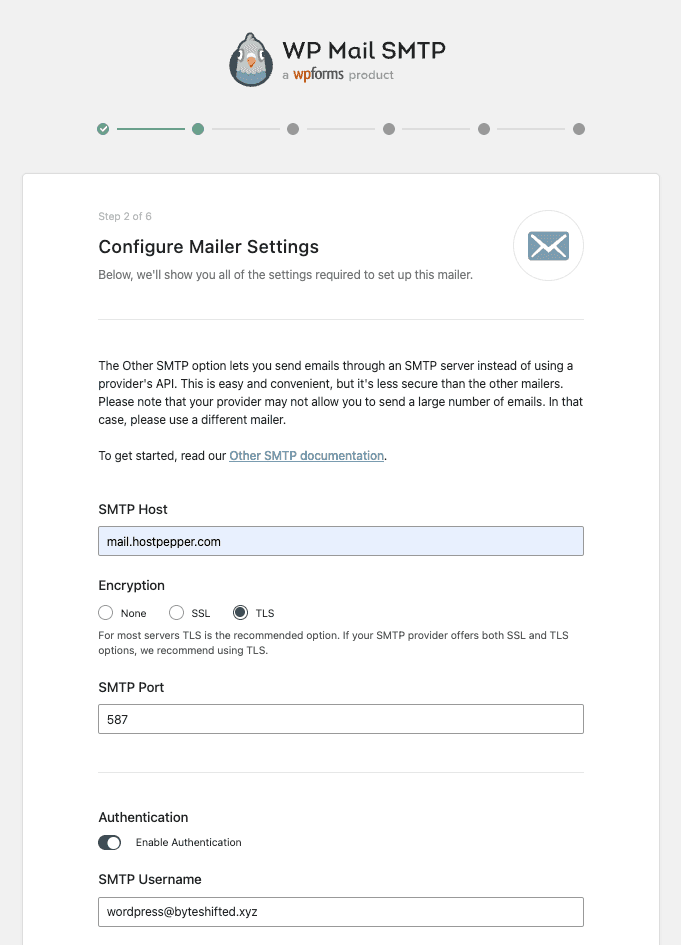
SMTP Password: the mailbox password from Step 1.
Click Save Settings.
Tip: turn on ‘Force From Email’ so every plugin sends from this address. Otherwise some plugins use their own sender address, which mail providers may reject.
Step 4: Send a test email
1. Go to WP Mail SMTP → Tools → Email Test.
2. Enter an address you can check (your personal email is fine) and click Send Email.
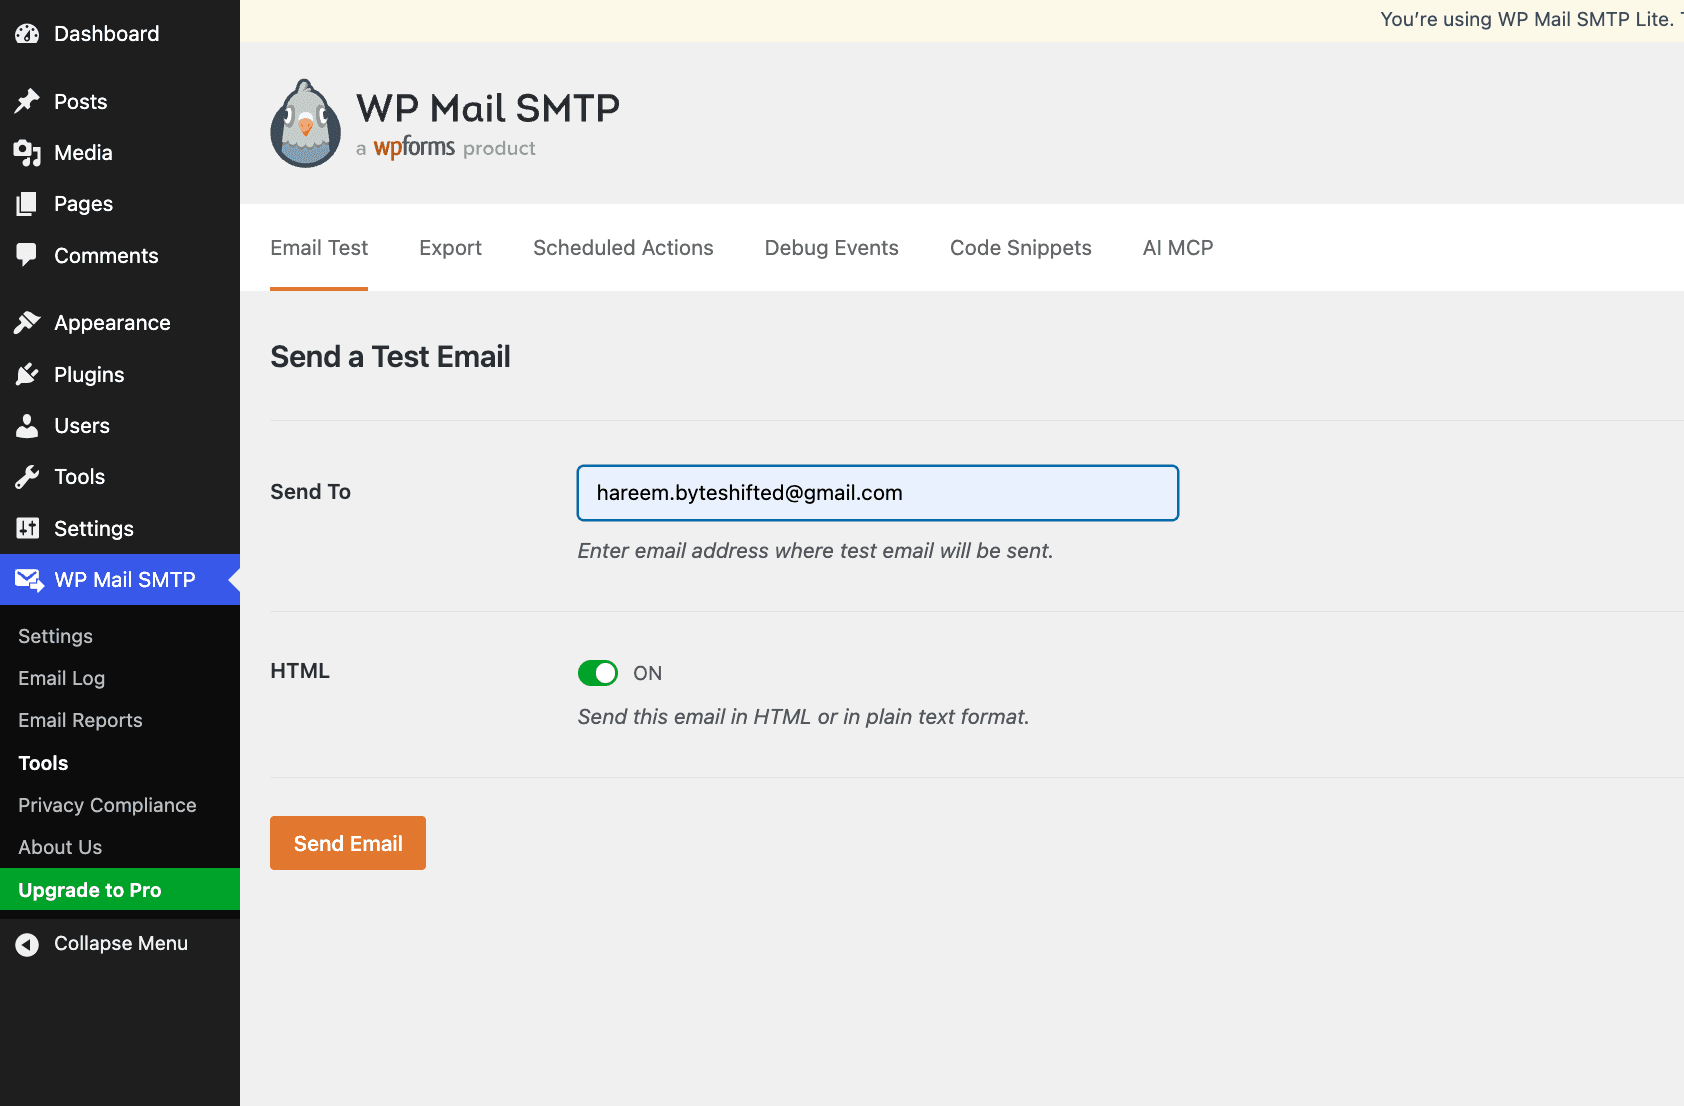
3. You should see a success message, and the email should arrive within a minute.
If it doesn't arrive, check your spam folder first. If it landed there, see the deliverability tip in Troubleshooting below.
Step 5: Test your contact form
Submit your own contact form the way a visitor would, using a private or incognito window. The message should now send successfully and arrive in your inbox.
Troubleshooting
‘Could not authenticate’: your username must be the full email address, not just the part before the @. Re-enter the password too, and if you're unsure of it, reset it in the control panel under Email.
‘Connection timed out’ or ‘Could not connect’: check that the host is exactly mail.hostpepper.com, and that the port matches the encryption (587 with TLS, 465 with SSL).
The test email works but form emails don't arrive: your form plugin is probably using its own sender address. Turn on ‘Force From Email’ in the WP Mail SMTP settings.
Emails land in spam: add SPF and DKIM records for your domain in the control panel's DNS settings. These tell receiving providers that your mail is genuine, and they greatly improve inbox placement.
Still stuck? Contact our support team with a screenshot of your WP Mail SMTP settings (with the password hidden) and any error shown by the Email Test tool.



SAFE AND SECURE PAYMENT